
Making Your Own Date-Sweetened Chocolate
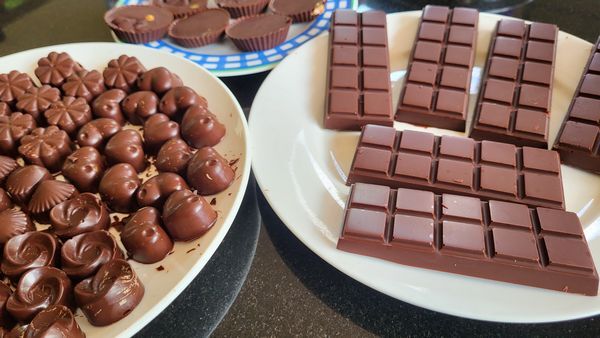
My name is Lester, and I am a Chocoholic.
I’ve given up many food vices in my life. The last remaining ones (almost the last) include chocolate. However, in the pursuit of quality over quantity, I have been stuck in this dilemma about how it is sweetened. Even with dark chocolates in the 80% range, it’s the 20% sugar that gets to me. And while I will eat chocolates with 90% or more cacao, I do enjoy some sweetness to balance the flavor.
When my son's family visited us in Panama, we went to a local chocolatier in Boquete to learn about chocolate-making. Boutique chocolate making is popular here, and I enjoy exploring different styles and flavors. However, what I realized was that almost everyone uses white sugar. A few manufacturers use Stevia, which can have an odd flavor, and some use monk fruit. My issue with monk fruit is that it contains erythritol, which can have many unpleasant side effects.
The Path to Date Sugar
It's understandable why a commercial chocolatier prefers white sugar as the sweetener. It has a neutral flavor, adding sweetness without overpowering the chocolate's essence. It blends smoothly into the chocolate and doesn't affect the texture. Plus, it's inexpensive.
The drawback is that it lacks essential nutrients and has a high glycemic index, leading to rapid fluctuations in blood sugar levels.
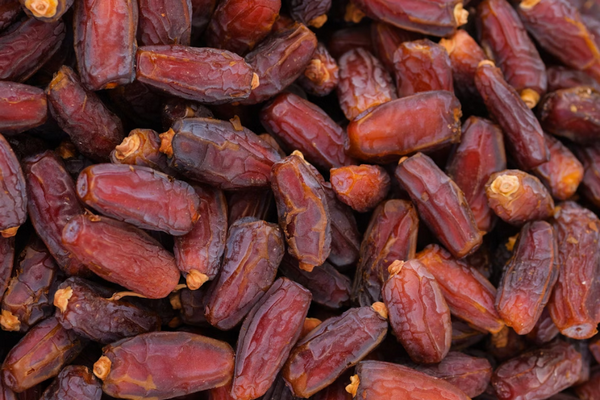
Date sugar, on the other hand, is simply dried, ground dates. It has a lower glycemic index of 55 compared to 65 (for white sugar) and provides fiber, calcium, magnesium, phosphorus, potassium, and antioxidants. However, there are a few drawbacks. The first is that date sugar adds a slight caramel flavor and does not behave like white sugar when making chocolate because of the fiber in the dates. The fiber must be ground very finely to avoid its presence being noticeable in the chocolate, which requires extra grinding time.
Date sugar is also considerably more expensive than white sugar, with prices up to 10-12 times higher. For these reasons, most chocolatiers avoid using date sugar.
However, my thoughts kept returning to the idea that I want to follow a whole-food, plant-based diet, and the chocolate with sugar I was eating didn’t align with my lifestyle choice. So, I did the math. Making my own chocolate with date sugar was still 40-60% cheaper than buying white sugar-sweetened chocolate. My initial $500 investment in equipment would pay for itself in two years, based on my family’s (and friends’) consumption of about 2.25 lbs of chocolate a month. And these calculations were conservative, assuming I bought Lindt chocolate rather than fancy bonbons. (Caveat – I purchase my Cacao in Panama, which is lower in cost than most US sources.)
Cacao at the Core

No matter what sweetener you use, the essential ingredient when making chocolate is cacao.
Cacao is mainly grown in tropical regions within a narrow band 20 degrees north and south of the equator, known as the "cocoa belt." Most commercial cacao production occurs even closer to the equator, typically within 10 degrees north and south of the equator. This is because cacao trees need a particular set of conditions to thrive, including:
- Warm Temperatures: Consistent temperatures between 70°F and 90°F (21°C to 32°C) are ideal.
- High Humidity: Cacao trees require high humidity; at least 80% is ideal.
- Abundant Rainfall: Plentiful and well-distributed rainfall throughout the year, typically between 1,500mm and 2,000mm annually, is necessary.
- Partial Shade: Cacao evolved as an understory tree in rainforests, and thus benefits from the partial shade provided by taller trees.
- Nitrogen-rich Soil: A well-drained, slightly acidic to neutral soil with a good organic matter content is preferred.
These conditions are typical of rainforests, where cacao naturally grows and is most successfully cultivated. Although efforts have been made to grow cacao in other regions, the plants' sensitivity to cold and frost, along with the need for high humidity, make commercial cultivation outside this zone difficult. Hawaii is one of the few exceptions, located just south of 20 degrees north latitude, where a growing chocolate industry is emerging.
Nutritionally, cacao is high in polyphenols and flavonoids, potent compounds that protect the body's cells from oxidative stress and may reduce the risk of chronic diseases. Flavonoids improve blood flow, help prevent blood clots, and may lower high blood pressure and bad cholesterol (LDL). Increased blood flow to the brain from polyphenols can enhance cognitive function, memory, and attention. Cacao contains compounds like phenylethylamine and tryptophan, which are linked to the production of endorphins and serotonin, respectively, potentially boosting mood and easing symptoms of depression. Cacao provides significant amounts of magnesium, essential for energy production and brain health; copper, vital for immune function; and potassium, necessary for heart and muscle function.
Difference between Cocoa and Cacao: Cacao refers to the raw, minimally processed form of the cacao bean. Cocoa refers to cacao beans that have undergone more extensive processing, including roasting at higher temperatures and sometimes alkalization (Dutch processing).
So, if all you need is cacao and a sweetener, what else is listed on a bar of chocolate? The most common ingredients include cacao butter and lecithin. Cacao butter enhances smoothness and contributes to the fat content, resulting in a better texture. Lecithin helps emulsify the butterfat with the cacao. Sometimes, other oils and fats, such as coconut or palm oil, are also added. Additionally, milk products may be used as emulsifiers in dark chocolate to improve texture and reduce some bitterness.
Where to Begin with the Ingredients
We are only using two ingredients: cacao and dates.
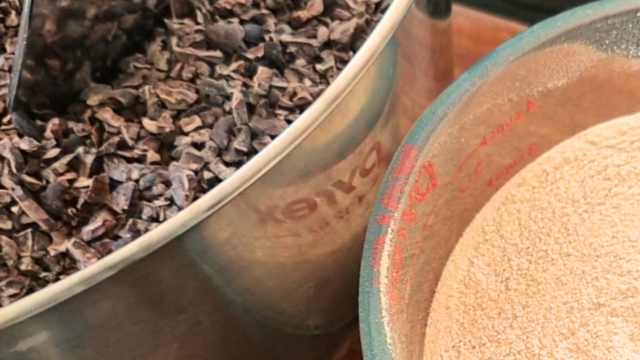
The cacao bean comes from the fruit of the cacao tree, and it is then fermented, dried, and roasted. After that, it is chopped, and the thin skin of the beans is winnowed away. The chopped bean is called a nib.
While some people may prefer to roast and grind their own beans, I recommend leaving that to the chocolatier. Buying beans is more cost-effective, but the grinding and winnowing process requires additional equipment and space. We will start from the nib.
Many branded cacao nib sellers are available on Amazon and other platforms. If you're serious about your new craft and hobby, consider purchasing from a wholesaler. Most will set a minimum order of just three kilos. If you find other chocolate enthusiasts, you might be able to upgrade to a larger bag.
Date sugar is somewhat more complicated because there aren’t as many places that sell it, although it is growing in popularity. It is simply dried dates that have been ground into a powder. Buying in bulk usually offers a better price. Retailers typically sell in two-kilo bags at a lower cost.
The Equipment
The major equipment you need to make chocolate:
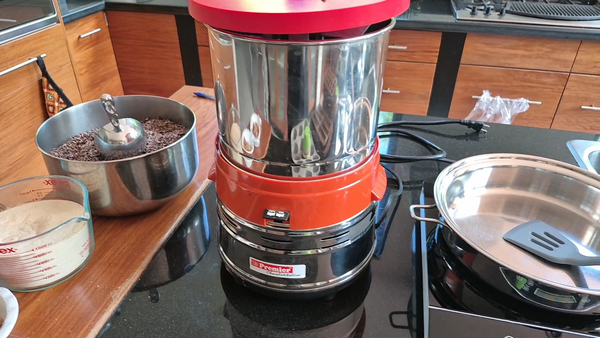
Using a Melanger for Chocolate Grinding. I admit I thought I could avoid needing one of these. I tried grinding chocolate with everything from a food processor to a coffee grinder. It turned out very gritty and bitter. I chose the Premier Chocolate Refiner Melanger for its sturdy build and the stone-grinding method, which can reduce cacao and date sugar down to 20 microns. I was pleased with its ability to run for several days without overheating or stalling. It cost me $400. Less expensive grinder options had smaller motors, more plastic parts, and seemed better suited for brief jobs like making nut butters or grinding beans.
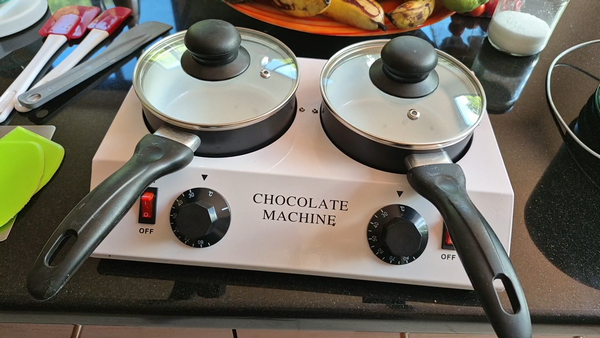
Warming station. This is for warming nibs and tempering chocolate. This could be an induction burner with a pan, a double boiler on a stove, or a chocolate warming station. You need to be able to control the temperature between 81°F (27°C) and 122°F (50°C) with fairly accurate precision.
Thermometer. For checking the nib temperature for grinding, the cooling temperature for tempering, and the warming temperature for pouring. Accuracy within a couple of degrees is essential.
Scale. For the best accuracy, the ingredients are weighed. A digital scale is most helpful here.
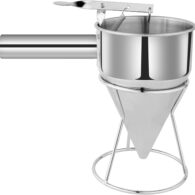
Ladle. There are several methods for pouring the chocolate, including using a ladle, a pitcher, or a piping bag. All of these work well to transfer chocolate from the pan to the mold. Over time, our favorite has been using a Stainless Steel Confectionery Funnel or a pancake batter funnel. It works best with the largest 1/3" tip or no tip attached.
Chocolate Molds. There is a vast selection of molds for chocolate making, and a quick online search will reveal molds for bonbons, bars, and fun confections such as peanut butter cups or almond butter cups. For best results, silicone molds make it easy to pop out your finished chocolate. Silicone cupcake molds are great for making peanut butter or almond butter cups.
Spatulas. A few spatulas handy for scraping down bowls and pitchers are quite helpful for all that gooey chocolate that sticks to pots, bowls, and tools.
Pastry Knives/bowl scrapers. These help clean the back sides of molds and clean up your spills.
Refrigerator. You need one for cooling the chocolate, and if you live in a warm climate, it's best to store your finished product in the fridge.
Storage containers for the finished chocolate. You would be surprised at how many pieces of chocolate come out of our 5.6-pound batch! Three hefty glass storage containers should do the trick.
Prepare Ingredients
Begin by weighing out the cacao nibs and the date sugar. For this recipe, use 4 pounds (1.8 kilograms) of cacao nibs, followed by 1.3 pounds (0.6 kilograms) of date powder. Note that using dates will not work because their water content can cause the chocolate to seize. Adding water to chocolate will cause it to seize, making it clumpy and unusable. Do not leave the date sugar outside a container in a humid environment.
Before pouring the chocolate into the molds, prepare fillings such as chopped walnuts and pecans, nut butters, essences, and other desired ingredients.
The Grinding Process
An optional step before grinding is to warm the cacao nibs. Warming them to about 100°F(38°C) releases the fat, making it easier to add the nibs to the grinder. Do not warm past 120°F(49°C). Add the nibs to the grinder at a speed that prevents the machine from straining or slowing down.
Note: If you are in a humid climate, keeping the temperature closer to 100°F(38°C) will prevent moisture from condensing on the date sugar. If moisture does condense on the date sugar, it will cause partial seizing of the chocolate. You will notice this with unusual rattling noises coming from the melanger. Stop the process, clean everything, and remove the siezed portions with very hot water. Thoroughly dry and restart the grinding.
Once all the cacao nibs are added, slowly add the date powder very slowly.
There is more than meets the eye when it comes to grinding cacao nibs into fine chocolate. While you will achieve a fairly nice chocolate texture within 12 to 24 hours, the taste may vary from batch to batch.
The grinder mentioned earlier is also a refiner. And it is not just to make the chocolate finer. The churning of the chocolate over time exposes it to air. This process is called conching, and it reduces the acidity of cacao by exposing it to heat and air. Although the chocolate appears ready to pour after a day of grinding, it is essential to check the flavor. As you become more experienced, you will be able to project the final product's taste more accurately. However, for now, add up to a day of additional conching time if the taste is too bitter or acidic.
Tempering the Chocolate
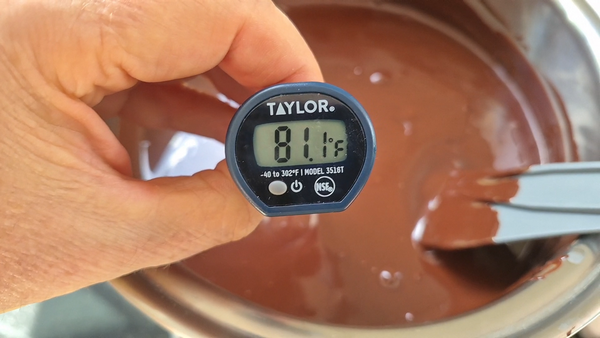
Tempering the Chocolate is essential to give it its shiny finish and crispy snap. The process aligns the crystals of cacao butter.
Once you have finished the grinding and conching process, you are ready to start tempering. Technically, the grinding process has already completed the first step by heating the chocolate to about 121°F(50°C). If you're in a very cool climate, it may not reach this temperature, and so you might need to warm it a little more. The next step is to pour the chocolate liquor into the tempering pan.
Cool it to about 81°F (27°C) by placing the pan on a bag of frozen vegetables or ice. Stir every few minutes to prevent the chocolate from setting at the bottom while remaining too warm on top. Some chocolatiers also spread the chocolate onto a marble surface or counter to cool it faster.
You can also add a piece of pre-tempered chocolate by melting it into the liquor to help speed up the process. Tempering is a tricky process, and if you don’t get it right, your results might be disappointing. If you have the time, you can test a small piece by cooling it to see how well the shine and snap work.
Pouring the Chocolate
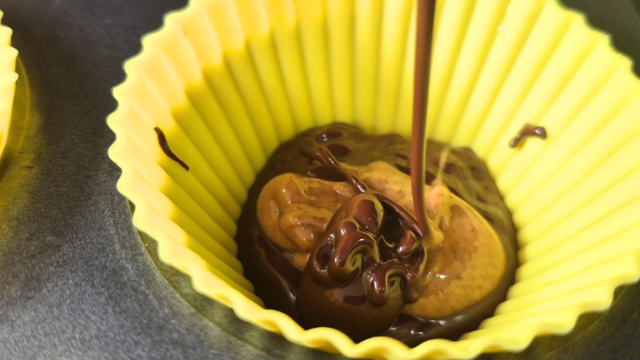
Once the chocolate cools to 81°F (27°C), it thickens and becomes difficult to pour. To make it pourable again, reheat it to 89°F(32°C). This can be done either directly in the tempering pan or with a dedicated chocolate warming machine that accurately controls the temperature for tempering and pouring.
Ensure all molds are clean and dry. Even a slight dampness in molds can cause discoloration in the chocolate.
For pouring, you can ladle the chocolate from the tempering pan, transfer it to a small pitcher, or use a piping bag (like those used for cake decorating). We use a Stainless steel confectionery funnel like this, available from confectionery suppliers and Amazon. We don't use the reduction tips because they slow the process too much.
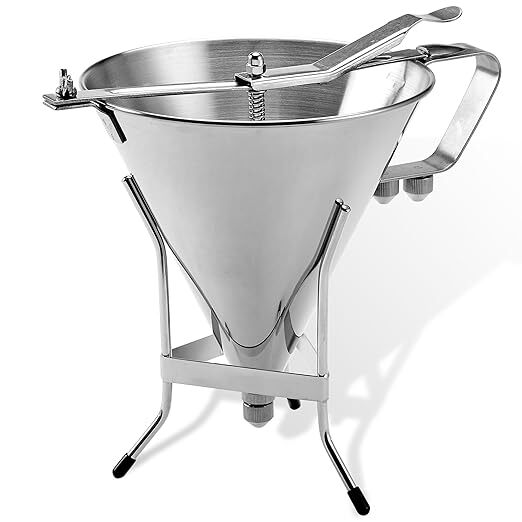
For a less expensive device, at about a third of the expense, is this pancake batter dispenser. Quite a bit smaller and more challenging to clean, it is also easier to handle for longer pours. The larger dispenser, above, is easier to control the fill rate.
For peanut butter cups, microwave the peanut butter for 20-30 seconds, until softened, making it easier to work with. Fill the cupcake mold with a 1/8-inch layer on the bottom until it’s just covered. Shake the molds to even out the pour. Then, place a dollop of peanut butter on top, shake again to get it even, and pour enough chocolate to cover the butter. You can also squeeze it through an icing piston or other icing applicator.
For nut-filled bonbons and bars, spread a layer of chocolate in the mold, sprinkle chopped nuts over it, and then cover with more chocolate. Use a pastry knife to scrape off excess chocolate from the top of the mold.
For simple-flavored chocolates, take a pitcher with enough chocolate to fill a mold, then mix in a few drops of orange, vanilla, cardamom, cinnamon, fennel, or peppermint essence.
Liquid fillings are a topic for another day!
Give each filled mold a good shake to release air bubbles.
Refrigerate for two hours or more to set. Remove the items from the molds and store them in a sealed container in a cool, dry place. Separate each layer of chocolate with parchment paper. You can keep it in the refrigerator, but it will develop condensation when you take it out. There is no significant loss of flavor, but the appearance will be less shiny.
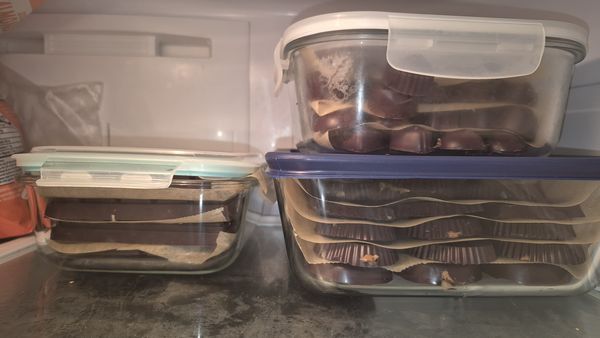
Your chocolate (plain, with nuts, or with nut butters) should last several months. Mine is always gone in a couple of months, so I wouldn’t know how long it really lasts…
Cacao beans photo courtesy of Sara Gomes